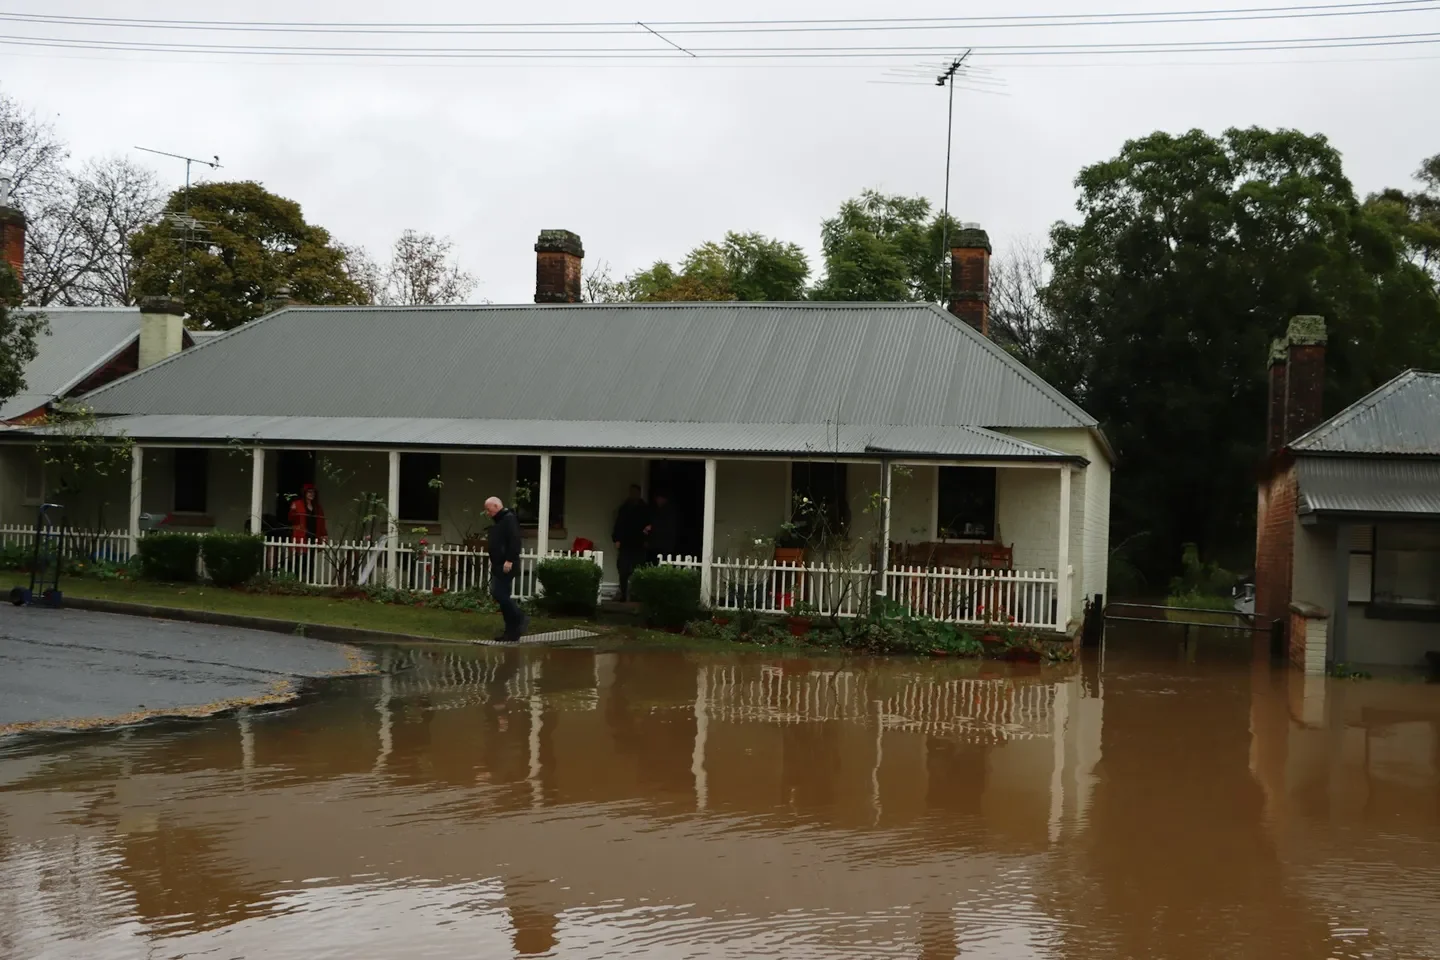
Basement flooding can result from heavy storms, broken sump pumps, foundation cracks, or sewer backups. For Los Angeles homeowners, while less common than in other regions, basement floods do occur and create serious damage when they happen.
Standing water in a basement affects foundations, damages stored belongings, creates electrical hazards, and establishes ideal conditions for rapid mold growth. The confined below-grade environment makes basement flooding particularly challenging to remediate without professional equipment and expertise.
This comprehensive checklist guides property owners through the entire basement flood cleanup process, from immediate safety measures to final restoration verification.
Pre-Cleanup: Safety Assessment (Do This First)
Before entering a flooded basement, assess safety risks that could cause injury or death.
Electrical Hazards
CRITICAL: Never enter standing water if electricity is on.
Water conducts electricity. Contact with energized water can cause electrocution. Before entering:
If the Electrical Panel is NOT in the Basement:
- Turn off all basement circuits at the main panel
- Shut off the main breaker if necessary for complete safety
- Only then enter the basement
If the Electrical Panel IS in the Basement:
- DO NOT enter the flooded basement
- Call a licensed electrician to shut off power from outside the property
- Alternatively, contact Los Angeles Department of Water and Power for emergency assistance
- Wait for professional confirmation that power is off before entering
Signs of Electrical Danger:
- Sparking or buzzing sounds
- Burning smells
- Visible electrical equipment underwater
- Outlets or switches in contact with water
Structural Stability
Flooding can compromise basement structural integrity:
Warning Signs:
- Cracked foundation walls
- Bowing or bulging walls
- Sagging floor joists above
- Separated wall-to-floor seams
- Visible settling or movement
If you observe structural damage, evacuate immediately and contact a structural engineer before attempting cleanup.
Contamination Assessment
Determine the water source and contamination level:
Clean Water Sources (Category 1):
- Broken water supply lines
- Water heater failures
- Rainwater from intact gutters
Contaminated Water (Category 2/3):
- Sewer backups
- Toilet overflows
- Storm water from outside
- Rising groundwater
- Flood water from streets
Sewage backup cleanup requires professional services with proper protective equipment. Never attempt DIY cleanup of sewage-contaminated water.
Gas Leaks
Flooding can disrupt gas lines or damage gas appliances:
If You Smell Gas:
- Evacuate immediately
- Don’t operate electrical switches or create sparks
- Call the gas company emergency line from outside
- Don’t re-enter until professionals clear the property
Immediate Response Checklist (First 24 Hours)
Once safety is confirmed, begin emergency response:
☐ Contact Professional Water Damage Restoration
Call our 24/7 emergency restoration services at (323) 677-2811 immediately.
Basement flooding requires professional extraction equipment. Standing water removal with household methods takes days or weeks. Professional extractors remove thousands of gallons in hours.
☐ Contact Insurance Company
Report the flood to your homeowner insurance provider within 24 hours:
Provide:
- Policy number
- Description of what caused the flood
- Estimated water volume if known
- Any immediate actions you’ve taken
Ask about:
- Coverage for water removal and restoration
- Requirements for professional versus DIY cleanup
- Adjuster assignment timeline
- Documentation needs
☐ Document All Damage
Before removing water or moving items:
Photograph:
- Overall basement condition from multiple angles
- Water level marks on walls
- Damaged storage items and belongings
- Mechanical systems affected (furnace, water heater, etc.)
- Source of flooding if identifiable
Video Record:
- Walk through the entire basement
- Show water extent and depth
- Describe what you’re seeing in audio
- Document all damaged areas
This documentation supports insurance claims and provides proof of loss.
☐ Identify and Stop Water Source
If flooding is ongoing, stop the source:
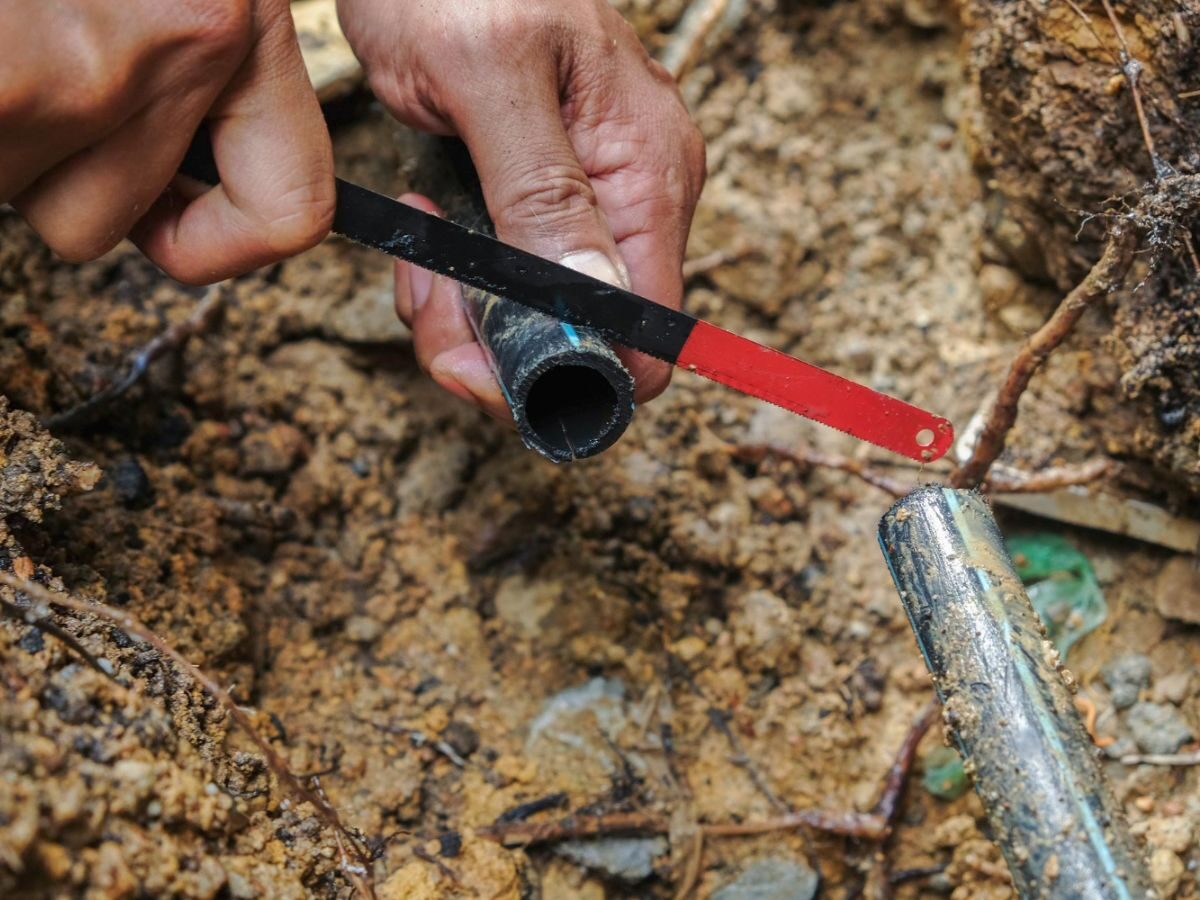
Broken Pipes: Turn off main water supply
Failed Sump Pump: If pump stopped working, try to determine why:
- Check power supply
- Clear debris from intake if accessible
- Consider backup pump if available
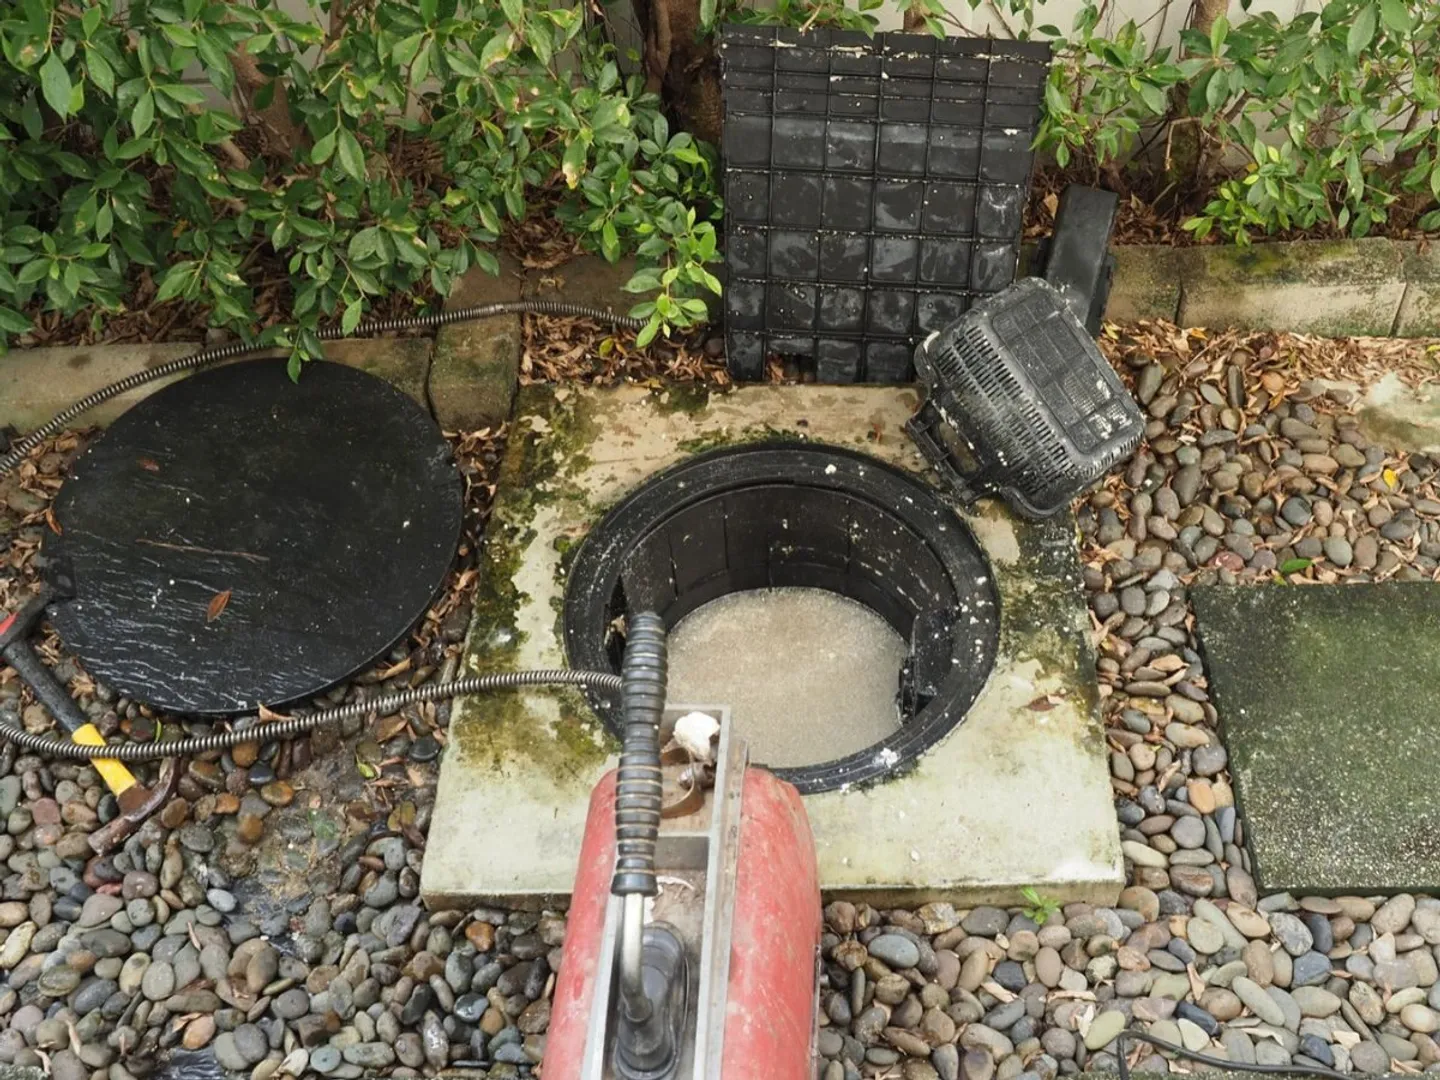
Sewer Backup: Don’t attempt to address yourself. Call a licensed plumber immediately.
Roof/Gutter Overflow: Clear gutters if safely accessible. Check that downspouts direct water away from foundation.
Rising Groundwater: This requires professional assessment and foundation waterproofing solutions.
Water Removal Checklist
Professional water extraction provides the most effective results, but if waiting for service:
☐ Remove Small Items from Water
Before pumping, remove items that could clog equipment:
- Toys
- Loose debris
- Cardboard boxes
- Fabric items
Don’t waste time trying to salvage everything yet. Focus on preventing equipment clogs.
☐ Begin Water Extraction
Professional Equipment (Recommended):
- Truck-mounted extractors: 2,000-4,000 gallons per hour
- Portable extractors: 500-1,000 gallons per hour
- Submersible pumps: Variable capacity
Household Methods (Limited Effectiveness):
- Wet/dry vacuum: 10-20 gallons per hour
- Manual bucketing: Extremely slow, not practical for significant flooding
Our professional water extraction services remove basement floods efficiently with industrial equipment.
☐ Handle Different Water Categories Appropriately
Category 1 (Clean Water):
- Extract completely
- Clean and disinfect surfaces
- Begin drying immediately
Category 2 (Gray Water):
- Extract completely
- Remove saturated porous materials
- Disinfect all surfaces thoroughly
- Professional drying recommended
Category 3 (Black Water/Sewage):
- Do not attempt DIY cleanup
- Professional restoration mandatory
- All porous materials must be removed
- Hazardous material protocols required
Content Removal and Salvage Checklist
After water removal, address damaged contents:
☐ Categorize Items by Salvageability
Likely Salvageable:
- Metal furniture if dried quickly
- Plastic storage containers
- Glass items
- Sealed containers
- Non-porous materials
Possibly Salvageable:
- Wood furniture if minimally damaged
- Electronics if dried professionally before power-on
- Hardcover books if dried flat
- Some tools if cleaned and dried
Not Salvageable:
- Mattresses and box springs
- Upholstered furniture
- Particle board furniture
- Paperback books
- Paper documents unless valuable
- Carpet and padding (if Category 2/3 water)
- Food items
- Medications
- Cosmetics
☐ Remove Unsalvageable Items Promptly
Don’t let damaged items sit in the basement:
- They hold moisture and slow drying
- Mold grows on wet organic materials
- Odors develop
- Space is needed for drying equipment
Photograph items before disposal for insurance claims.
☐ Clean and Disinfect Salvageable Items
Hard Surfaces:
- Wash with detergent and water
- Rinse thoroughly
- Apply disinfectant solution
- Air dry completely
Valuable Documents:
- Freeze immediately to prevent deterioration
- Professional document restoration services exist for important papers
Electronics:
- Do NOT power on
- Professional electronics restoration may recover some items
- Never attempt to dry and use without professional service
Structural Cleaning and Drying Checklist
After content removal, address structural materials:
☐ Remove Water-Damaged Building Materials
Category 2/3 Water – Remove:
- All drywall in contact with water
- All insulation
- All carpet and padding
- Heavily saturated wood materials
Category 1 Water – Evaluate:
- Drywall: Can sometimes be saved if dried within 48 hours
- Insulation: Usually requires removal
- Carpet: Padding must be removed; carpet may be salvageable
- Wood: Can often be dried if addressed quickly
☐ Clean All Remaining Surfaces
Concrete Floors:
- Sweep debris
- Scrub with TSP (trisodium phosphate) solution
- Rinse thoroughly
- Apply EPA-registered disinfectant
- Allow to dry
Walls:
- Wash with detergent solution
- Rinse clean
- Disinfect
- Dry completely before rebuilding
Mechanical Equipment:
- Clean water heaters, furnaces, HVAC systems
- Have HVAC professionally serviced before operation
- Replace water heater if water level reached burners or controls
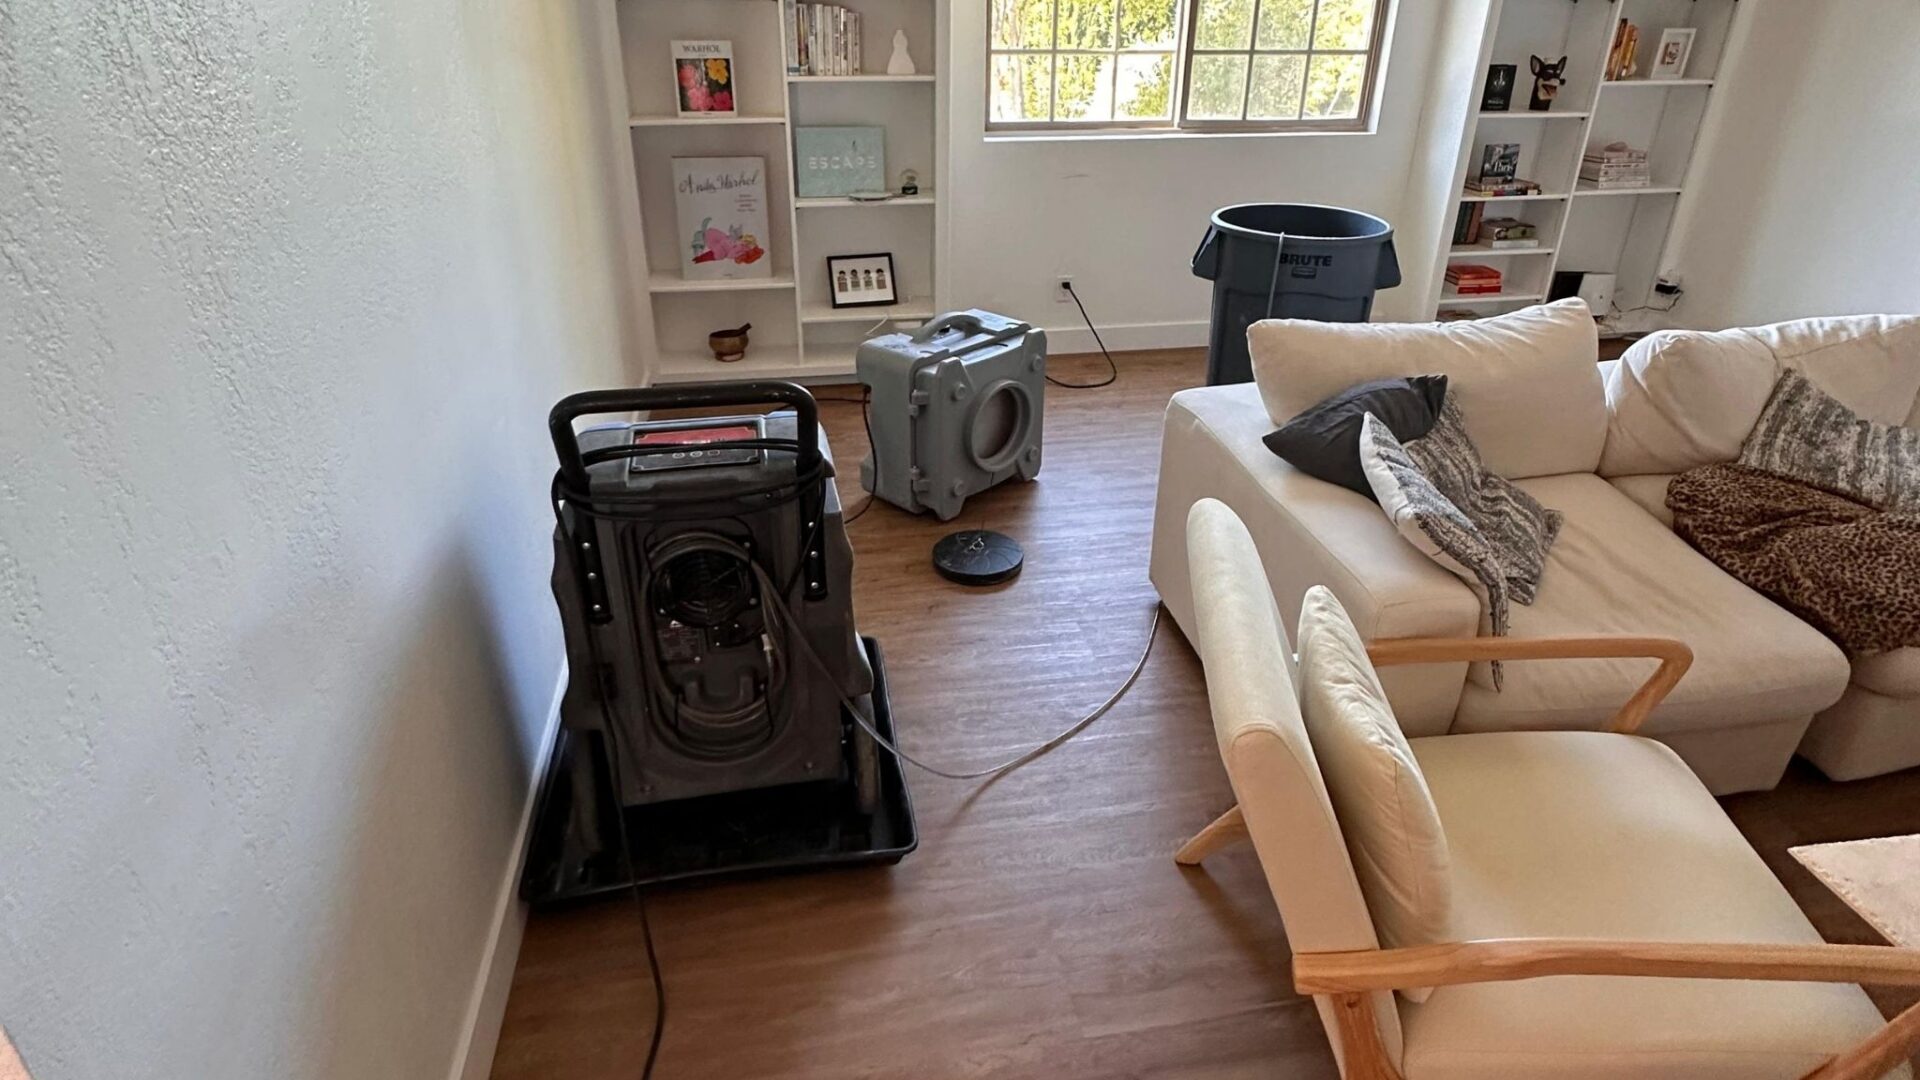
☐ Deploy Drying Equipment
Professional drying requires:
Air Movers: Position to create airflow across all surfaces
- Target remaining structural materials
- Create air circulation patterns
- Run continuously 24/7
Dehumidifiers: Remove moisture from air
- Commercial units rated for basement conditions
- Empty or drain continuously
- Monitor humidity levels daily
Additional Equipment:
- HEPA air scrubbers for mold prevention
- Specialty drying mats for certain materials
- Heating systems if temperatures are low
Our structural drying and dehumidification services provide industrial equipment and professional monitoring.
☐ Monitor Drying Progress
Daily checks should include:
Moisture Readings:
- Use professional moisture meters
- Test multiple locations
- Track readings on chart to show progress
- Materials must reach specific moisture content levels
Humidity Levels:
- Maintain below 50% relative humidity
- Adjust dehumidifier settings as needed
Temperature:
- Warm temperatures accelerate drying
- Maintain 70-80°F if possible
Equipment Function:
- Verify all equipment operating
- Empty dehumidifier reservoirs
- Clean filters as needed
Mold Prevention and Treatment Checklist
Basements provide ideal mold growth conditions. Prevention is critical:
☐ Rapid Response
Mold colonization begins within 24-48 hours. Speed prevents growth:
- Begin extraction within 24 hours
- Deploy drying equipment immediately
- Monitor conditions continuously
☐ Antimicrobial Treatment
When appropriate:
- Apply EPA-registered antimicrobial solutions to affected surfaces
- Focus on areas previously wet
- Follow product instructions for application
- Allow proper contact time before drying
☐ Air Quality Maintenance
During restoration:
- Run HEPA air scrubbers continuously
- Maintain negative air pressure if possible
- Filter air before venting outside
☐ Inspection for Mold Growth
If drying takes more than 48 hours, watch for:
- Musty odors
- Visible spots or discoloration
- Increased allergy symptoms
If mold appears, professional mold remediation is necessary.
Post-Drying Restoration Checklist
After complete drying, rebuild and restore:
☐ Verify Complete Drying
Before reconstruction:
- Professional moisture meter readings must confirm proper moisture content
- All materials must be below threshold levels
- No musty odors should be present
- Surfaces should feel dry to touch
☐ Rebuild Removed Materials
Drywall Installation:
- Use mold-resistant drywall in basements
- Ensure complete drying of studs before hanging
- Leave gap at floor for air circulation
Insulation:
- Install fresh insulation
- Consider closed-cell foam in flood-prone basements
- Ensure vapor barrier orientation is correct
Flooring:
- Allow subfloor to dry completely
- Consider water-resistant options:
- Ceramic tile
- Luxury vinyl plank
- Sealed concrete
- Avoid carpet in flood-prone basements
☐ Address Root Cause
Prevent future flooding:
Sump Pump Systems:
- Install backup power supply
- Add water-level alarm
- Test monthly
- Replace every 7-10 years
Foundation Waterproofing:
- Seal cracks
- Apply waterproofing membrane
- Install exterior drainage if needed
Grading and Drainage:
- Ensure ground slopes away from foundation
- Extend downspouts 10+ feet from house
- Install French drains if necessary
Sewer Backups:
- Install backwater valve
- Avoid pouring grease down drains
- Schedule annual sewer line inspection
☐ Implement Flood Prevention Measures
Install:
- Water detection alarms
- Battery backup sump pump
- Check valves on drain lines
- Automatic water shutoff systems
Maintain:
- Gutters and downspouts clear
- Sump pump tested regularly
- Foundation drains functional
- Grading proper around foundation
Professional Restoration vs. DIY Considerations
While some basement flood cleanup can be DIY, professional restoration provides significant advantages:
When Professional Restoration Is Essential:
- Category 2 or 3 water (contaminated)
- Flooding exceeds 3 inches deep
- Affected area exceeds 10 square feet
- Water entered wall cavities
- Mechanical systems were submerged
- Structural damage present
- Insurance requires professional documentation
When Limited DIY May Be Appropriate:
- Category 1 water only
- Less than 1 inch deep
- Concrete floor, no carpet
- Minimal contents affected
- You have access to professional moisture meters
- Complete drying achieved within 48 hours
Even for small floods, professional moisture verification is recommended to ensure no hidden water remains.
Insurance Documentation Checklist
Maximize insurance recovery with complete documentation:
☐ Maintain Detailed Records
Before Cleanup:
- Photos and videos of all damage
- List of all damaged items
- Receipts for damaged items if available
During Restoration:
- Daily photos showing progress
- Moisture meter readings
- Professional service invoices
- Material receipts
After Completion:
- Final moisture verification
- Completed work photos
- Total cost summary
☐ Professional Estimates
Our restoration estimates include:
- Complete damage assessment
- Scope of necessary work
- Itemized costs
- Industry-standard pricing
We work directly with insurance adjusters to support your claim.
☐ Communication Log
Document all insurance interactions:
- Date and time of calls
- Person you spoke with
- Topics discussed
- Next steps agreed upon
Timeline Expectations
Understanding realistic timelines helps planning:
Day 1:
- Emergency response and safety assessment
- Water extraction
- Content removal begins
- Drying equipment deployment
Days 2-5:
- Continue drying process
- Daily monitoring and adjustments
- Content cleaning and salvage
- Damaged material removal
Days 5-7:
- Final drying verification
- Equipment removal
- Initial reconstruction planning
Week 2+:
- Reconstruction and restoration
- Mechanical system servicing
- Final cleanup and inspection
Total timeline varies based on flood severity, water category, and extent of necessary reconstruction.
Contact ASAP Water Damage Restoration Los Angeles
Basement flooding creates complex restoration challenges requiring professional equipment and expertise. From initial water extraction through final reconstruction, proper procedures protect your property investment and prevent long-term problems.
Our IICRC-certified team provides comprehensive basement flood damage restoration services throughout Los Angeles. We respond 24/7 with truck-mounted extractors, commercial drying systems, and professional moisture detection equipment.
Call (323) 677-2811 for immediate basement flood cleanup.
We serve properties throughout Los Angeles, including areas where basement flooding occurs most frequently.
Don’t attempt basement flood cleanup alone. Professional restoration ensures complete drying, prevents mold growth, and protects your home’s foundation and structure.